K92 - Escape #6
This is an Escape Vented, built with 1.9oz Ottertex Ripstop Nylon, framed in P300 (Spine), P3X (Leading Edge), Nitro Strong (Lower Spreaders), and 6mm pultruded carbon (Upper Spreader). This build is based on the Escape open source plan by Ulzburger Kites .
Venting
This kite was commissioned by a friend who requested a venting configuration like this. I’m not sure how the venting along the spine will behave, but I’m eager to find out.
I built the vented panels like I have in other recent vented kites, with a layer of icarex covering the back. I think this approach turns out very nice.
Leading Edge spreader openings
I am frequently annoyed by how the Escape’s leading edge breaks down because of how the bridle is attached further away from the lower spreader connection. Typically, I need to work it for a moment to get the bridle to go inside the leading edge pocket so I can separate the upper and lower leading edge. I decided to move the lower pocket opening a little further out to make this less of an issue. This almost worked, but I moved it just far enough to separate the frame, but not far enough to fold the leading edge without undue strain on the Dacron at the fold. Next time, I’ll push it out another 1cm or so.
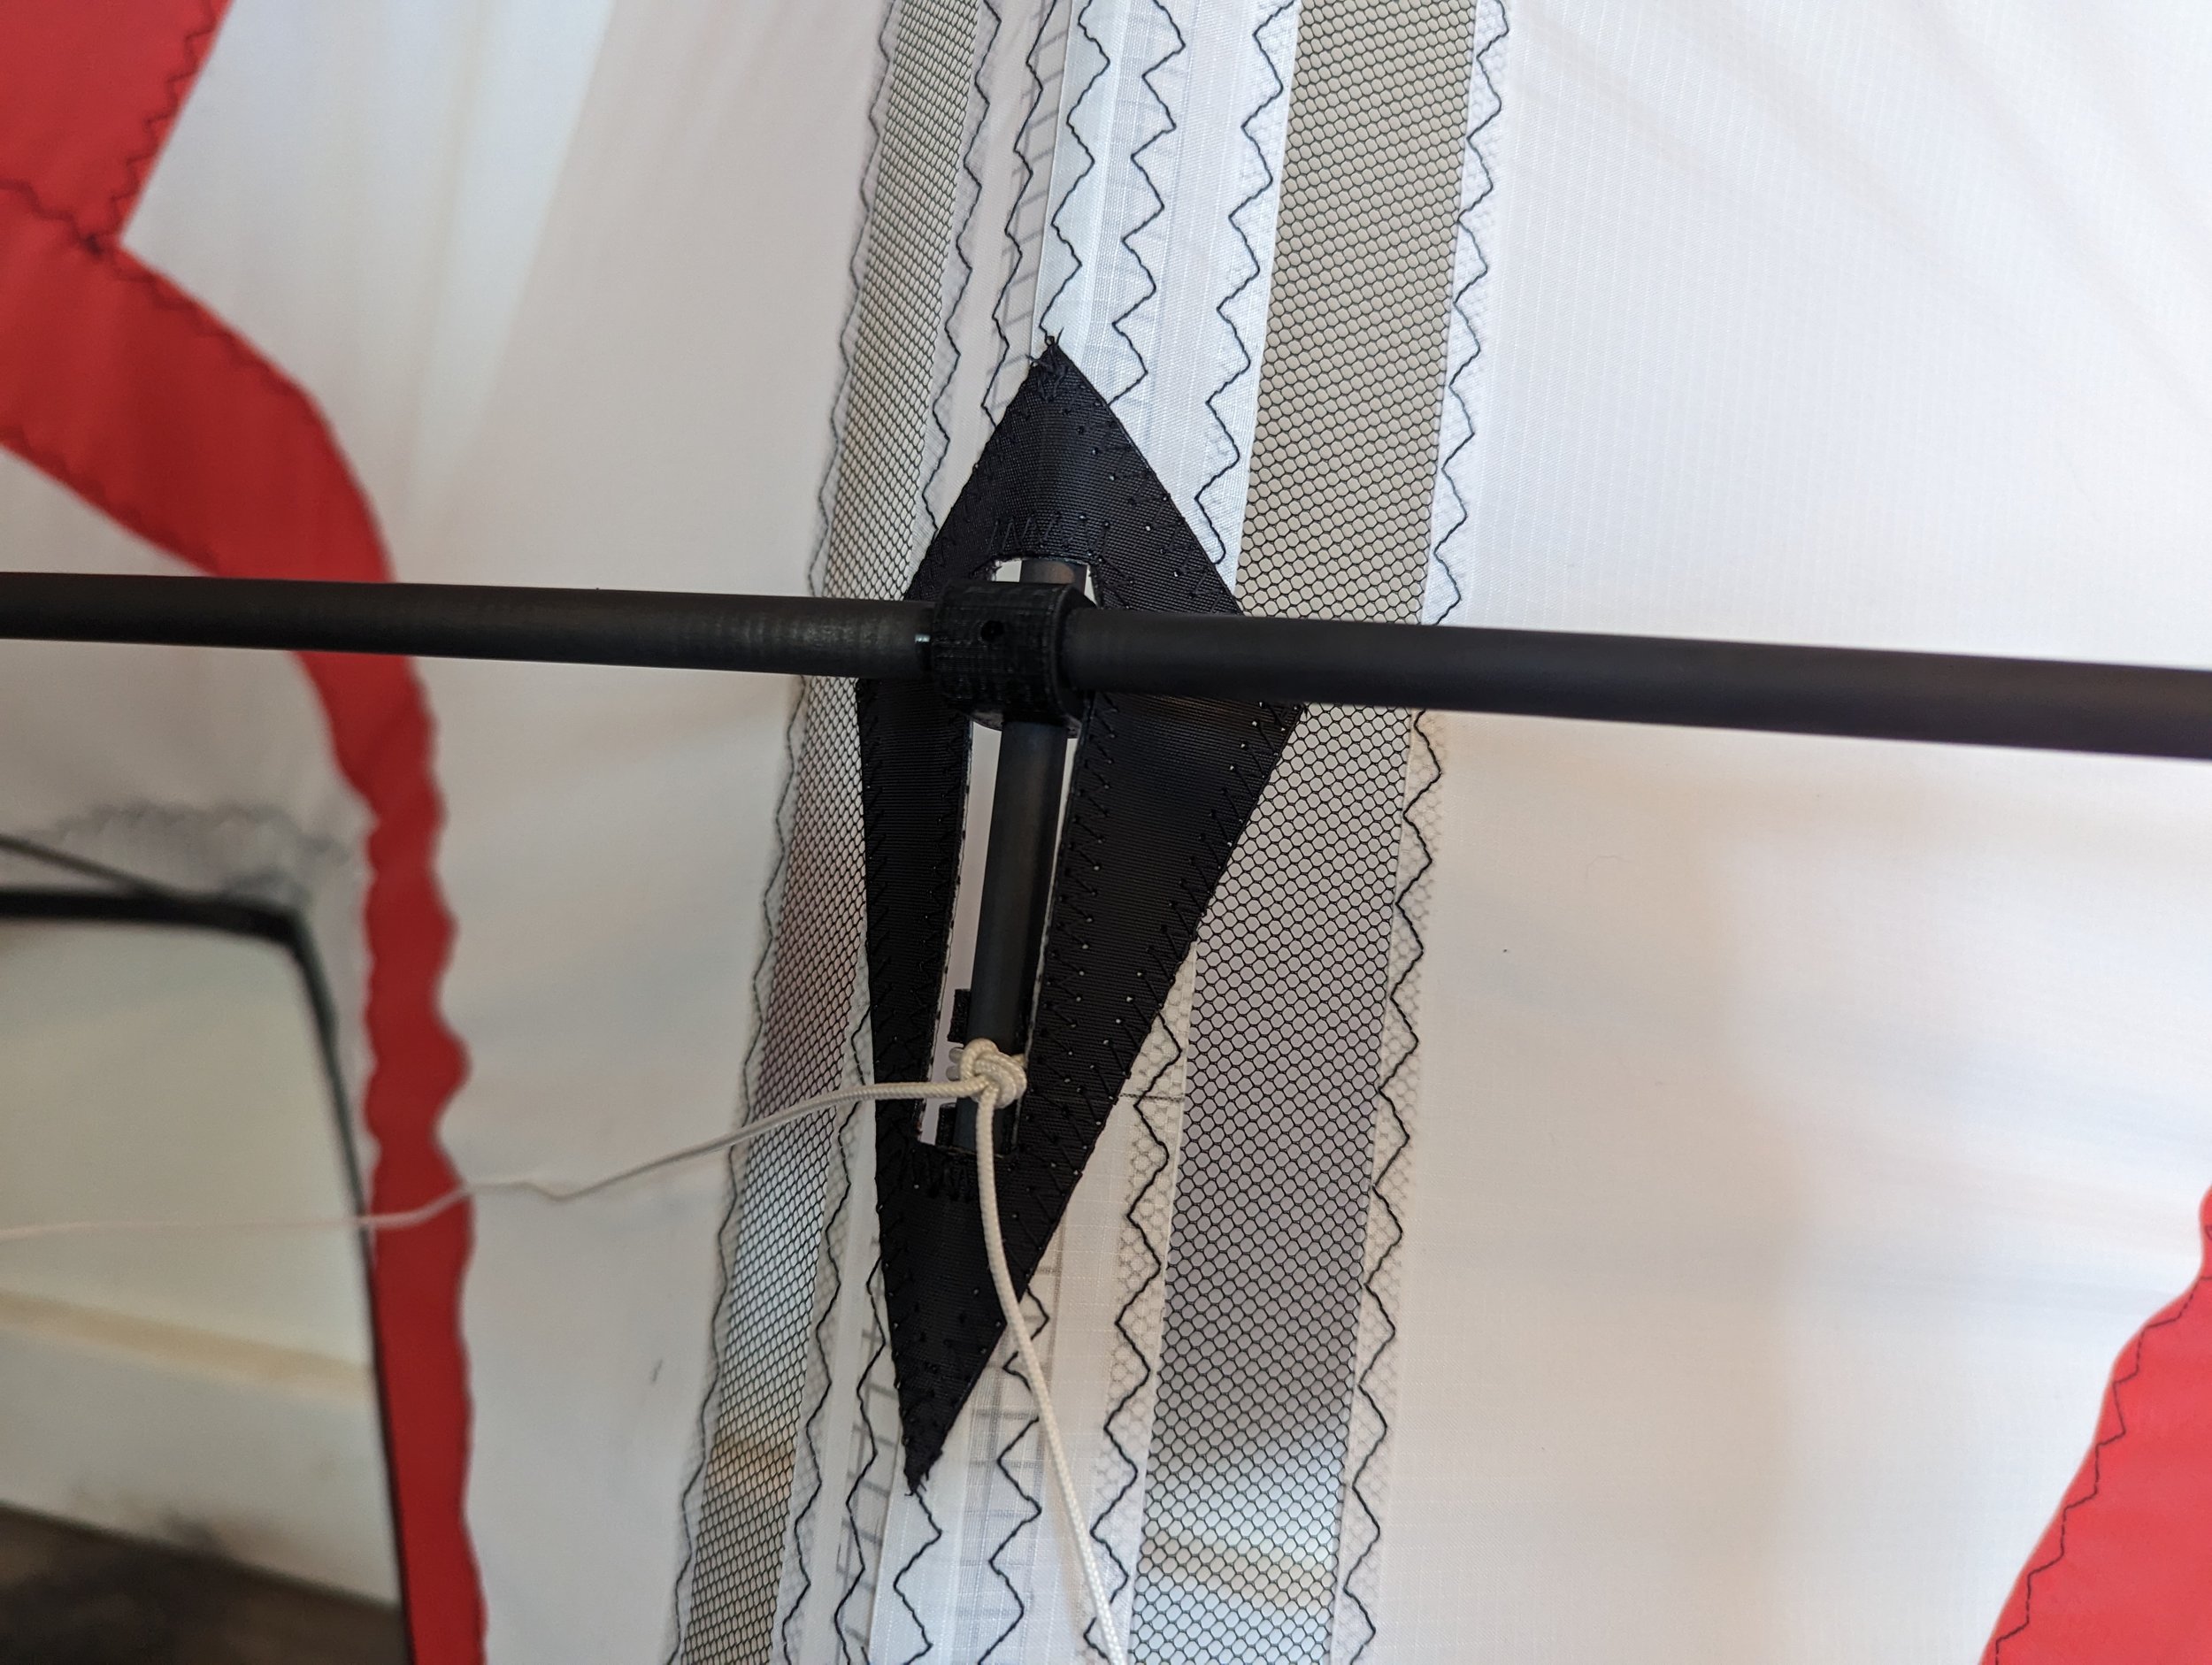
Center T Opening
I changed the way I did the opening for the center T to a tight rectangle. The existing plan has this much more open, but I don’t like how that rhombus shape distorts when the spine is under tension. By limiting the opening just enough to let the bridle and fitting through seems to keep that spine structure more intact.
P3X instead of P300
I bought P3X for this one instead of P300. When talking with John, from Skyshark, he explained to me that they are basically the same thing, but P3Xs are about an inch shorter. P3Xs are much cheaper because they are just more readily available. I like the P3X better for the leading edge because it makes the upper and lower spreader a little closer to each other in length, so the collapsed package is a bit smaller. However, the P3X was a tad short for the spine, so I used a P300 instead. I could use a ferruled P3X, but I still have a few P300s laying around, so using that seemed easier.
Sleeve
I’m continuing with my newer approach to making sleeves, which I started with K91. This time, I used 1/4” bias tape where the colored segments meet, and 1/2” around the perimeter. I tried using 1/4” at the top, but it was just a bit too thin, so this sleeve has 1/4” on one side and 1/2” on the other. While sewing around the perimeter, I had a bit of issue with my bobbin snagging periodically, resulting in occasional poor tension, which was annoying. I sewed back over the particular problem spots, but it’s not quite as clean looking as I would like.


